Pages

Thursday, April 26, 2012

Pirate Extraveganza- The Party Activities

It only took half a week, but I think I have finally caught up on my sleep. I figured it was probably about time that I posted the rest of the pictures from the party. I don't really feel comfortable posting pictures of other people's children without their permission, so I apologize for the lack of action shots. I also failed to charge the batteries in my camera before the party, so the majority of pictures were very gratefully taken by my wonderful mother-in-law.
I spent enough time in Cub Scouts to know that I would need a gathering activity while all of the kids were arriving, so that I didn't have them running wild all over the place. I found this pirate shoulder parrot craft at Disney's Family Fun. The kids had fun coloring their own parrots.
 Meanwhile, I had set up a simple photo booth to take their pictures. I had plans for a more elaborate backdrop, but ran out of time. Oh, well.
After everyone had made their parrots and gotten their picture taken, we introduced the Pirate Training Program and gave them each their own "treasure map" with outline. The guests were 4-5, so the treasure map was more for the sake of having a map than actually finding anything.
 First on the agenda was reading How I Became a Pirate by Melinda Long, illustrated by David Shannon. I love that book- the pictures are amazing. The kids were surprisingly attentive while I read the story to them. After the story, they all were given loot bags with pirate stickers in them (Walmart had some pirate party supplies).
 Next on the agenda was Pin the Eye Patch on the Pirate. I drew a picture of a pirate on poster board and covered it with contact paper for the backdrop. For the eye patches I cut out a patch shape (I used these as my pattern-there were other printables as well) and laminated them 
 The prize for everyone (cause pirates share their loot), was an eye patch, of course.
Eventually I will post my tutorial for how I made these.
The third activity was Sink the Pirate Ship with the bean bag cannonballs. The prize: cannonballs (Whoppers).
I created the labels in Word (circles 1.9" in diameter with a 7 width on the outside line) and cut them out with a 2" punch, and glued them on scrapbooking paper that I had cut into 3"x4" rectangles and folded over little bags that were 3" wide (I found these in the jewelry section at Walmart). Not that anyone noticed, but my candies were all in multiples of 5, just because I am OCD like that.
The next activity was a Cannonball Pop. 
I inserted five plastic gold coins in black balloons and blew them up (that is them in the garbage bags on the trampoline). The kids had to sit on their balloons and pop them to get their prize.
Next up was Walking the Plank (the wind might have taken out some of my sharks and waves). I cut the shark fins and waves out of foam board from the dollar store. I made bases from scraps of foam board that I hot glued on, and spray painted them.
Avast ye! The kids were pretty good at walking the plank.
The prize for this activity changed several times. What I really wanted were some gummy sharks. I could not find them anywhere in town. On-line, they were more expensive than I wanted to spend. Idea number 2 was some hooks for their hands. I found some online at Party City that were only 50 cents each. When I went to pick them up, I discovered that the Party City here had gone out of business. My mother-in-law checked at the Party City near her, only to find out they were being discontinued and were all sold out. That left me scrambling at the last minute to come up with something, hence more "gold" (Wearther's Original). If I had more time, I found a hook tutorial here that wasn't too cheesy)
 For Go Fish, I hung an old shower curtain on some PVC pipe that I hung from our First Up gazebo. I cut fish out (Cricut Paper Dolls Dress Up cartridge) and laminated and taped to the front. For extra color my brother-in-law and I taped up streamers.
My fishing pole was a dowel that I painted brown and used some jute twine with a clip attached to the end.
The prize: Swedish Fish.
Next up was a Buried Treasure dig. I filled an underbed storage tote with ring pops, necklaces, marbles, and coins left over from the Cannonball Pop, and covered it all with sand.
 I think everyone had fun digging for treasure. If I was to do this again, I think I would have used two totes to accommodate the number of pirates I had in attendance.
 Last on our list was X Marks the Spot.
 This activity went through several idea stages as well. I thought about actually burying a large treasure chest for the kids to dig up, but thought that would not be exciting (think 5 year-olds standing around watching one person dig). I thought about burying individual treasure chests for each to dig up, but I don't like sand that much. Finally, I was inspired by Easter Eggs. I glued tongue depressors together to form and X and spray painted them red (I made enough for each child to find one). My brother-in-law hid them in a designated area. The kids had to find an X which they could exchange for their personal treasure chest, which was filled with a pirate bandanna.
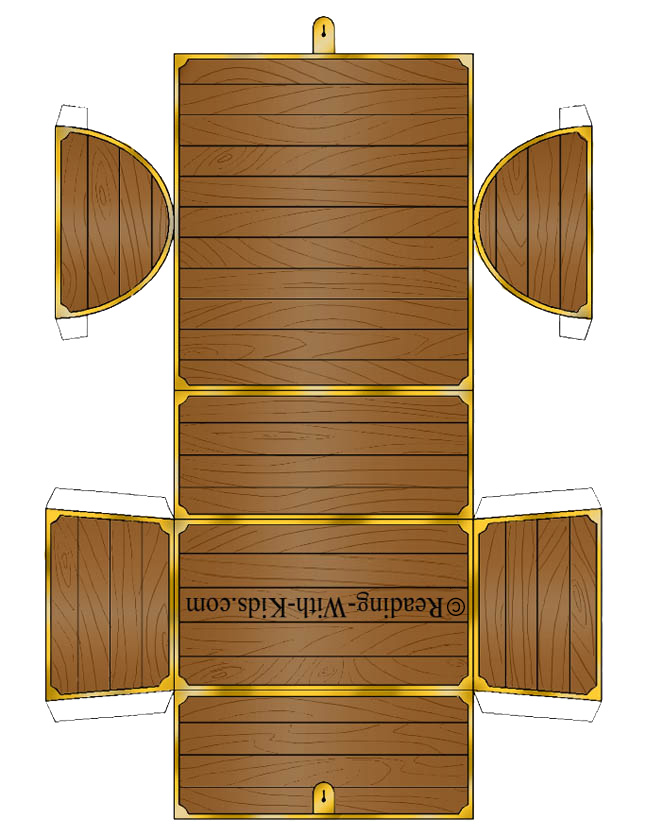
 The treasure chests I printed out here from this website. I cut them out, laminated them, and glued them together. I put a little piece of velcro on the lock to hold them closed.
 The bandannas I made using the Simplicity 2792 pattern (I made the large size). I should probably mention that the weather didn't cooperate for this party. The forecast called for 102 F of sizzling sunshine, and it was. Other than the heat, it turned out great. I had enough adults on hand to keep the kids from going wild, and enough kids to keep it just the right amount of party crazy.
 After they completed all of the activities, each child received their own Certificate of Completion, designating them as Pirates.
After becoming Pirates, it was present and food time. The timing worked out perfectly. We were just getting done eating when the parents arrived to take their little pirates home.
And one last picture, just because she was such a cute Pirate. Kitty had a great time at her brother's party. She was glad that one person wasn't able to make it, because being the silly mom I am, when I was planning all the activities, I just planned for the number of kids we invited, forgetting I had one more little girl here who would like to participate.

Sunday, April 22, 2012

Pirate Extraveganza- The Invitations

I should probably put a disclaimer on this series of posts- I have been obsessing over this party for probably the last two months. My husband has already banned me from ever going this "over board" on a party ever again. Needless to say, I have loved almost every minute of it. Pirate is such a fun party theme with so many ideas available and merchandise galore.

Invitations
I liked the message in a bottle look for invitations. I started by creating an invitation in Word. I found a fun font, Pieces of Eight, that I used on most everything. On one side I had the who what where why info, and on the back I made a map to our house. I printed the invitations out on a linen paper, cut the edges with a deckle blade and then burned the edges.
The invitations were rolled up and tied with a red ribbon.
 I put them in IBC root beer bottles that I had cleaned out. I contemplated putting some sand in there, but decided some mothers would prefer that I not let their child dump sand all over the floor. I tied on the names with some jute twine.
Invitations that needed to be mailed I put in envelopes I printed from here.
Two weeks before the party, for Family Home Evening, we dressed like pirates and personally delivered the invitations. You can get a lot of strange looks dressed up and ringing doorbells in April. Apparently that is the way to go though. Of the 12 kids invited, only one wasn't able to come, and I heard from more than one mother that their child spent the day (or days in some cases) carrying around their invitation like a prized treasure.  It is high praise to be included in a child's cherished possession collection. I feel honored. Tiger and Kitty had a fun time passing out the bottles. Monkey slept through it all.

Treasure Map Cake

I was all excited when Tiger chose a pirate theme for his birthday. Finally I was going to get to make one of those fun pirate ship cakes I have seen everywhere. But no, he wanted a treasure map cake. That is OK, I found one I liked here. The day before the party I started to work on it. I made the marshmallow fondant for the first time (I used the recipe here). Having never made it before, I was a little nervous, and added a bit more powdered sugar than I think I should have (the recipe calls for a 2 lb. bag- I think I only should have used about 3/4 of the bag). Fortunately in the comments I had read that someone suggested kneading in shortening if it is too dry. I tried that and was able to salvage my fondant. It actually worked in my favor, because the dryness added to the old parchment look. After making the fondant (it says it needs to sit to cool down, but I think if I had wanted I could have used it right after I made it), I started working on the cake. This one was strawberry with a strawberry preserve filling. I made some buttercream frosting (recipe here), tinted it blue, and frosted the cake. I put a scalloped border around mine, just to give it a slightly finished look. And then I went to bed. By the next morning, Grandma was here and fortunately helped out on the cake while I was working on setting things up for the party. She rolled out the fondant and (from the back-side) sprayed gold food paint around the edges. After she got it all on the cake, I used some food markers to draw the map. Not wanting to spend the time molding different pictures for the cake, we used candles (like these ones). The "X" was red licorice. Around the bottom of the cake we layered gold coins and crushed Nilla Wafers. 

Mango Salsa

While planning my son's pirate birthday party, I was looking for pirate-esque foods. I thought that Mango Salsa sounded nice and tropical and therefore pirate-y. Fortunately for me, that very week mangoes went on sale, and the Fry's (Smith's, Kroger) ad had a recipe for Quick-N-Easy Mango Salsa. It turned out to be quite tasty (warning- I made it a few hours before the party and thought it was just right. However, the next afternoon I tried another bite and it had really kicked up a notch. I like my salsa mild. If you prefer it hot, just give it an extra day). I doubled the batch, which turned out to be a good amount.

Quick-N-Easy Mango Salsa
1 mango- peeled, seeded, and chopped
1/4 cup red bell peppers, finely chopped
1 green onion, chopped
2 tablespoons cilantro, chopped
1 fresh jalapeno chili pepper, finely chopped
2 tablespoons lime juice
1 tablespoon lemon juice

In a medium bowl, mix mango, red bell pepper, green onion, cilantro, jalapeno, lime juice, and lemon juice. Cover and allow to sit at least 30 minutes before serving.

Saturday, April 21, 2012

Sneak Peak- Pirate Party

We had a swashbuckling good time at the pirate party today. I thought I would share a sneak peak of the menu before I went and fell into a deep sleep (oh, I shall sleep well tonight). So, until I get around to post the rest, enjoy.

Thursday, April 19, 2012

Pirate Cookies

 These were the pirate cookies that I made for the Tiger to take to preschool for his birthday. I learned a couple of very important things while making these cookies. The most important probably being that I will NEVER buy the Betty Crocker Cake Icing that dispenses with a nozzle ever again. There is absolutely no control. There are two colors that I won't mix myself and unfortunately these cookies called for both- black and red (they are hard to achieve without making the frosting taste nasty). The Cake Icing was the only black I was able to locate at my local Walmart, and it completely messed up my cookies. Fortunately, my target audience are four and five year-olds, so I think I will be forgiven.

Thursday, April 12, 2012

Santa Fe Chicken

Here is the next addition to the tried-and-true crock pot recipes that I have received. This time I actually followed the recipe. I was getting all excited about a colorful crock pot meal, until I added the block of cream cheese. This is another one that next time, I think I am going to skip the cream cheese step. Other than the color being less than appealing, I enjoyed scooping up bites of if with tortilla chips.

Santa Fe Chicken

Ingredients:
1 can of black beans
1 can of corn
1 cup of salsa
4 boneless, skinless chicken breasts
1 block of cream cheese

Combine in Crockpot:
  • 1 can black beans
  • 1 can corn
  • 1 cup salsa
 Stir and then add:
  • 4 boneless, skinless chicken breasts (cut up into bite-sized pieces is optional)
  1. Cook on low for 3 hours.
  2. Add 1 block of cream cheese and stir.
  3. Cook for one more hour
  4. Serve over rice!  Yummy!

More pictures...

If you noticed, this is pretty much the only one of the nieces
and nephews that will pose for me. Silly girl.


These iPod pictures were actually lucky. She was playing with it
and looked up at the right moment.


This one wasn't posed. She just looked so cute and thoughtful.

Pictures

I'm not exactly a great chef or seamstress like my sisters, but I do enjoy taking pictures. These are just a few that I liked and wanted to share. I had some other pictures that I really liked too, but they were unfortunately on the other computer that is currently unavailable.


Cheesy Grin

Sunset through the backyard

Guns and Roses again (: This was Spencer's idea though.

Reflecting pool at Temple Square- close up of the floating bubbles

Christmas lights with Temple in the background

Wednesday, April 11, 2012

Penny wanted pink penguins...

And she got them. I'm sure Scott really wanted pink penguins for his birthday too. I uploaded the pictures backwards, so you get to see the not-so-great cupcakes first. Voila.


These ones are the "extra" cupcakes. In other words, when I got too lazy and ran out of time for the actual penguins, I used my leftover yellow frosting to put simple designs on the remaining cupcakes.

Here is the full picture of the penguins surrounding the "ice." Due to miscommunication, I found that we didn't have any Swedish fish (contrary to my father's previous assurances). I ended up putting some pink starbursts in the microwave for a few seconds and shaping them into fish with my fingers. The ice is leftover cookies with blue sprinkles.

This is a close-up shot of the actual penguins. Oh the marvels of sugar cookies, food coloring, frosting, chocolate chips, and starbursts. Who would have thought? I couldn't really say how to replicate these cupcakes though, as I pretty much made it up as I went. However, I did see a picture online to get an basic idea. I hope they were well received, but I didn't actually get to see her reaction at the birthday party.

Tuesday, April 10, 2012

Sink the Pirate Ship

I went through many ideas in my head for how to make my Sink the Pirate Ship game. I thought about using some of that foam poster board stuff (I decided that would make my ship smaller than I thought my target audience would be capable of hitting), I thought of finding a large appliance box (that one sounded like lots of effort to find someone tossing out big boxes), and finally settled on buying a thin sheet of plywood and painting it (I even looking it up online- it would have been about $6). But then three things got in the way of that plan- #1: I was impatient, #2: I rarely have a desire to go to Home Depot with children, and #3: I was feeling cheap. As I was wandering around my house admiring my new fence (It is beautiful by the way), I stumbled over the PVC pipe remains of our chicken coup, and a new idea came to mind.
The finished product. How did I get there? I shall show you.
 First, I went through my fabric stash and pulled out anything that looked like it might work. I laid them out to get an idea.
 After sewing my sky and water together, I cut out a ship outline. My "reference" was the pirate ship I can cut with the Paper Dolls Dress Up Cricut cartridge, but any picture or clip art image will do.
 I spray mounted the ship so that it would stay somewhat in place and then went around all the edges with a zig zag stitch to keep it in place. I did the same thing with the sails (except the upper sails, those I just stitched a straight line across the top). The flag and port holes I spray mounted on, but I ended up painting around their edges with puff paint instead of sewing them (the skull on the Jolly Roger was painted on as well).
 I used my small plates for hole placement and size. Yup, they are the same plates that I used to make the cannonballs.
 This is what it looked like cut out.
 I took more fabric and sewed big pockets that I attached to my holes (just make sure that the circumference of the pocket is at least as big as the circumference of the hole- a little bit bigger is OK since you can gather the pocket to make it fit much easier than stretching the pocket to fit the hole. I might have had to unpick all of the first pockets that I made and make them larger so that they would look better. As you can see in the picture above the pockets are hanging kind of funny). This step is optional. I just didn't want to have to go chasing all over my yard for stray balls. It also finished the look. (You could use this same idea to make those picture prop thingies (technical term I am sure) with the face cutouts. You also don't have to do a pirate theme- it would work for whatever you want.)
 I took another piece of fabric the same size as my picture for the back and sewed the two together. I would actually recommend attaching the two together before sewing in the pockets so that you can cut holes in the back fabric easier. This step could also be skipped if you wanted to just sew velcro or straps or sleeves for the posts to go through. As long as you can attach it to the PVC it should be fine.
I almost forgot to mention the upper sails. To finish them, I just folded them up, accordion style, and tacked them in place with some hand stitches. It gave it a nice little 3D touch.
After I had my fabric all finished, complete with dried paint (I added a few birds too- they are hard to see) I made a simple frame from the PVC. For mine, I was using 1" PVC pipe (that is what I had on hand) and I figured I would need to cut the horizontal posts 4" shorter to account for the elbows on the corners. I probably could have gotten away with closer to 3", but it works just fine the way it is. The other measurements weren't technical- just enough to get it off the ground. My ground braces are a little long, but my husband was cutting them and I just told him to cut me four shorter pieces whatever length would be the easiest. That is what he brought me. I ended up using 6 elbows and 4 tees in addition to the pipe. I think my finished horizontal measurement was 41". The height was a little more than that.
 The back view. To finish the edges on the back I did sew some bias tape around them. That was purely because I am silly like that. I also sewed a finishing seam around my pockets from the front. 
 Even the little Monkey has had fun playing with the pirate ship. She is pretty good from this distance.
My changed plans came with a bonus that I didn't even realize in the beginning- storage is going to be so much easier than if I had bought a sheet of plywood. It collapses down quite nicely. Another bonus is that the frame is interchangeable. I could make other bean bag toss games, or photo booth type thingies (I'm sure they must have a name, but I don't know what it is). The possibilities are endless.